Compared with foreign countries, the public network disk ecology in China is like a pool of stagnant water. Of course, this is due to manufacturers not wanting to make progress, but more importantly, the government’s strict review of network information makes it difficult for public network disk service providers to strike a balance between maintaining their own survival and improving user experience.
After a bloody storm a few years ago, the only public network disks that are famous in China are [Baidu Network Disk] (https://pan.baidu.com/
“Baidu Network Disk Official Website”), [Yutong Network Disk] (https://union.ctfile.com/
“Yutong Network Disk Official Website”) and [Nutt Cloud] (https://www.jianguoyun.com/
“Nutt Cloud Official Website”). The most notorious among them is Baidu, which not only has harsh functional restrictions on non-member users (land capacity + download speed limit), but is also extremely bloated and has many redundant functions that most users cannot use at all. In contrast, Nut Cloud is much better. It only limits monthly traffic for free users. In addition, it neither limits speed nor redundant content. It can be said to be very conscientious.
 However, compared with the convenience of Baidu Netdisk generating links for direct sharing, Nut Cloud is slightly insufficient in file sharing. Therefore, in the current domestic public network disk ecosystem, it is almost impossible to use a network disk product with simple functions, convenient sharing, and unlimited speed for free. In this case, many users began to turn to the Private Cloud (NAS)
solution, that is, to establish a private network storage server, such as purchasing Synology
or QNAP
NAS host or build a DIY host yourself. However, both the former and the latter have certain technical thresholds and are not suitable for all users.
However, compared with the convenience of Baidu Netdisk generating links for direct sharing, Nut Cloud is slightly insufficient in file sharing. Therefore, in the current domestic public network disk ecosystem, it is almost impossible to use a network disk product with simple functions, convenient sharing, and unlimited speed for free. In this case, many users began to turn to the Private Cloud (NAS)
solution, that is, to establish a private network storage server, such as purchasing Synology
or QNAP
NAS host or build a DIY host yourself. However, both the former and the latter have certain technical thresholds and are not suitable for all users.
As a basic service in the Apple product ecosystem, iCloud is used by almost all Apple device users. Whether you realize it or not, whenever you take a photo with your iPhone, your photos are automatically stored in your iCloud. Regardless of whether you pay or not, as long as you sign up for an Apple ID, you’ll get 5GB of iCloud storage. Although this capacity is not large, it is completely sufficient for storing daily photos and office documents. For years, iCloud has been criticized for its closed nature. Perhaps for data security reasons, Apple does not allow users to share files in their iCloud drives with others. But the good news is that this situation has been completely changed in the latest MacOS system update.
This morning, when I turned on my computer and prepared to start today’s work, I found that Apple had pushed the latest version of MacOS 10.15.4 system update, and the update description contained a paragraph of envy:
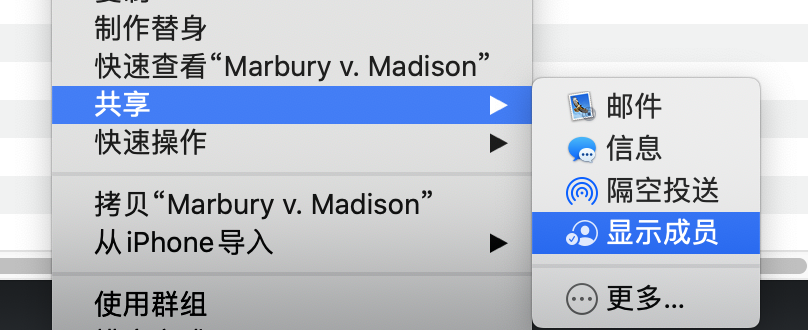
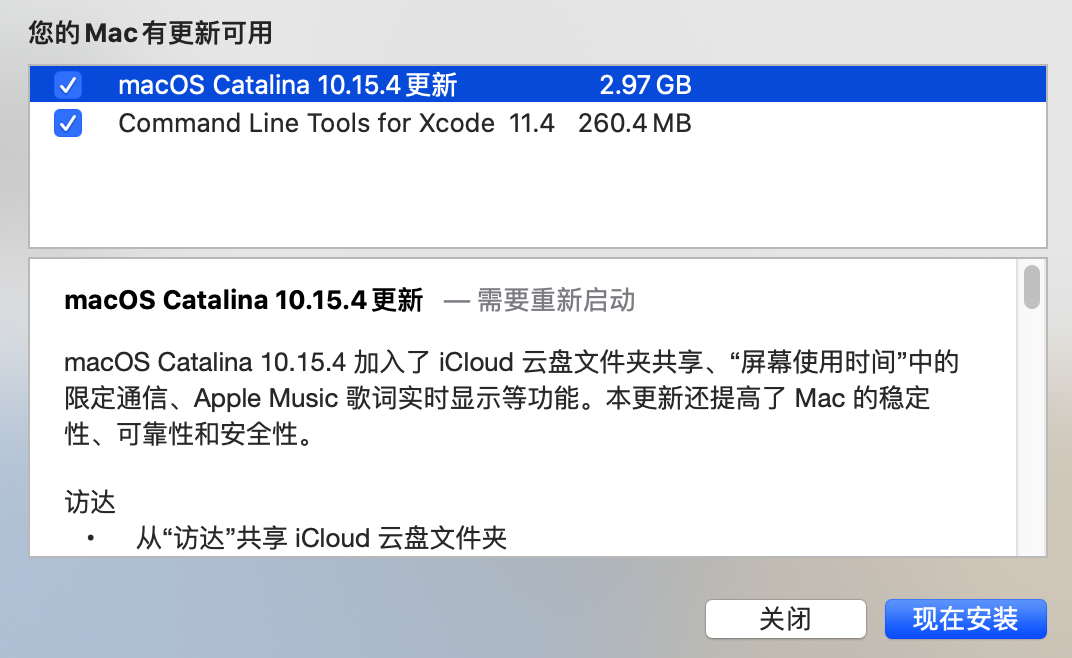 In other words, iCloud finally supports external file sharing! So I immediately updated the system and wanted to experience the feeling of sharing files with icloud as soon as possible. In the new version of the system, just right-click on the icloud file, select “Share”, and then click “Add User” to generate a sharing link for the file.
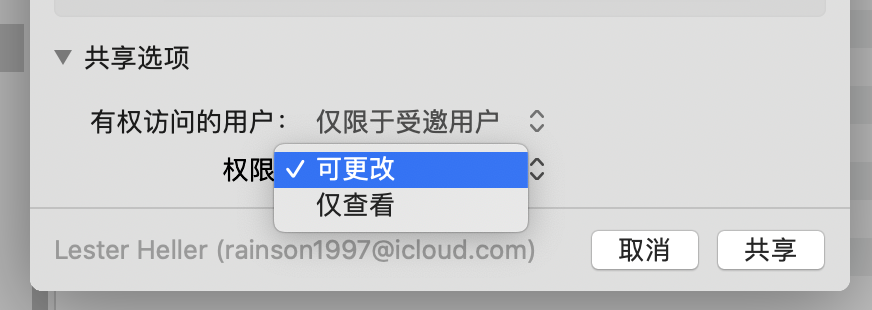
 After opening the “Add User” dialog box, we can set the shared link accordingly. If we only want to share files with invited users, we must not only set the “Users with access” to “Invited users only” below, but also fill in the email addresses of the users we invite above. Note that the “Invited User” function is currently only open to other Apple IDs, and the email address filled in must also be the login email address of the Apple ID.
 If we want to create a publicly shared link, rather than making it viewable only to specific users, then we can select “Anyone with the link.” In this way, as long as the shared link we created is sent to others, the users who own the link can open the corresponding link to browse the file at any time.
In addition, we can set the access permissions for shared files in the options below. Among them, “View Only” is read-only permission; “Can Change” is read-write permission.
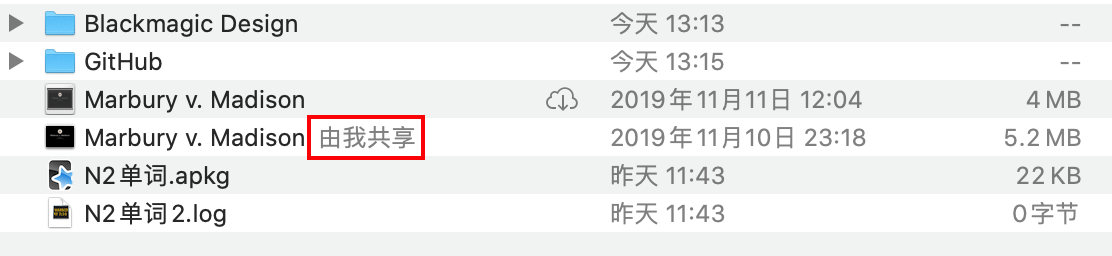
 After the settings are completed, by clicking the “Share” button below, we create a sharing link for the specified file. After the shared link is created, it will be automatically copied to our clipboard, and the words “Shared by me” will appear after the name of the corresponding iCloud file, making it easier for us to find it later.
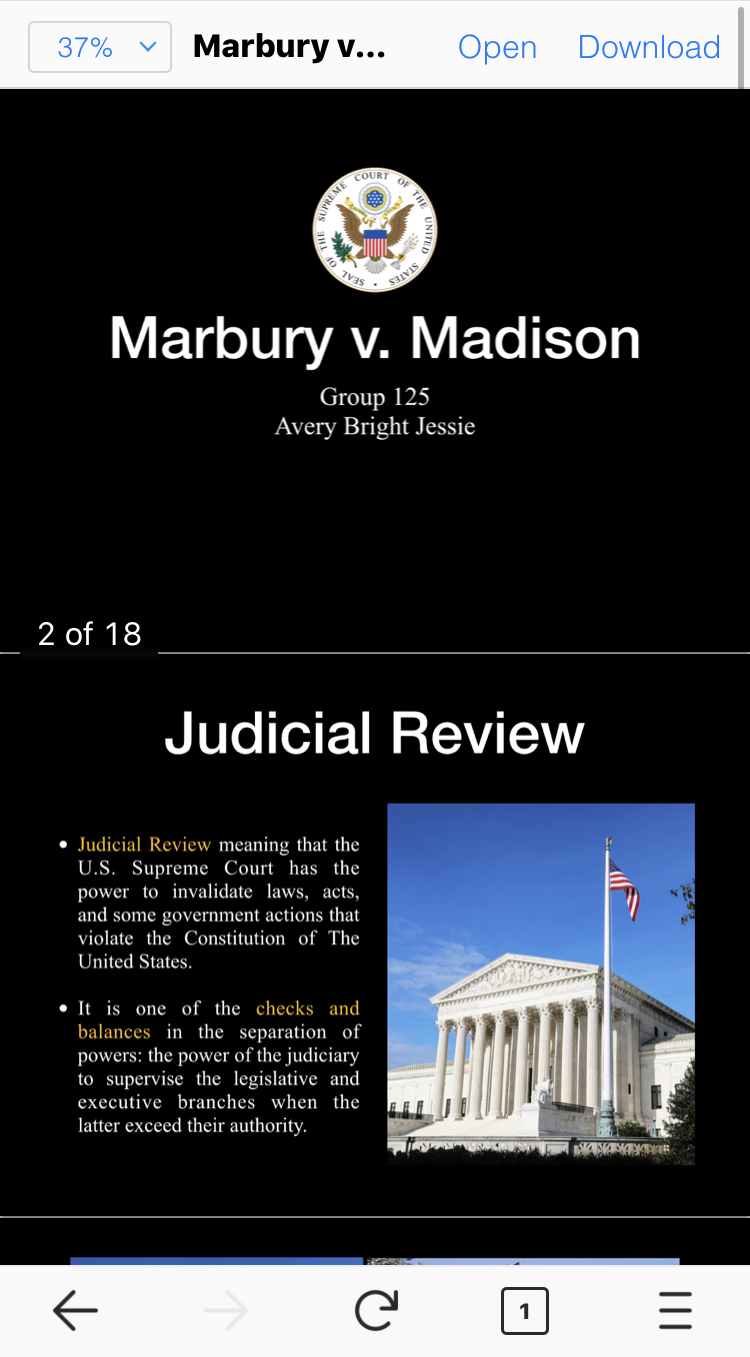
 Now, we can send the copied shared link to other users, and let them open the shared link through their browser to read or change the corresponding file. It is worth mentioning that if the shared file is in a format such as PDF, you can directly preview its content by opening the shared link without having to download and view it first, which is very convenient.