Principle and environment detection
With the continuous iteration of versions, Jellyfin has gradually surpassed Plex and its brother Emby to become the personal media management solution with the largest number of users. This is not only because all its functions are free, but also because its source code is completely open source and has extremely high room for maintenance and expansion.
Regardless of the specific operating system used to run Jellyfin, as long as the system is based on Linux, we can achieve extremely simple and consistent deployment through Docker containers. But compared with the native package, Docker has an obvious shortcoming, that is, it cannot directly call various system resources, and the integrated GPU driver is one of them.
In order for Jellyfin’s Docker container to call the integrated GPU driver in real time (which is often called turning on the hardware decoding), two conditions must be met:
- Have a integrated GPU that supports video decoding, and the driver of the integrated GPU is running normally;
- Pass-through the integrated GPU driver to the Docker container and grant the Docker container the permission to call the driver.
Whether the system meets the first condition above can be checked in the following way: first use the ssh tool to connect to the server, ensure that the account logged in to ssh has system management rights, and then enter the following command:
ls /dev/dri
If the returned result is card0 renderD128, then congratulations, the integrated GPU driver is running normally and the hardware system meets the basic conditions for video decoding. The next step is to pass renderD128, the integrated graphics driver, directly to the Docker container.
Why must I use Portainer?
Whether it is Synology, QNAP or Unraid , most NAS systems on the market provide graphical Docker container management tools. But no matter which one of the above, it does not support the pass-through function of the integrated GPU driver. Synology’s Docker suite cannot edit the system resource parameters of the container, and QNAP’s Container Station simply cannot edit the created container.
The “pass-through” mentioned here actually maps the driver file /dev/dri/renderD128 to the same location of the Docker container. This can be achieved very easily using the command line, by adding the following parameters to the pull command of the Jellyfin container:
--device=/dev/dri/renderD128 \
Therefore, to quickly pull and create a Jellyfin container with hardware decoding enabled, just enter the following command in the command line interface of the NAS:
sudo docker run -d --name jellyfin \
-v /share/Container/Jellyfin/config:/config \ # directory for config files on the host
-v /share/Container/Jellyfin/cache:/cache \ # directory for media cache on the host
-v /share/Media/:/media \ # directory for movie files on the host
-p 8096:8096 \ # web UI access port (HTTP)
-p 8920:8920 \ # web UI access port (HTTPS)
--device=/dev/dri/renderD128 \ # map the integrated GPU driver
--restart=always \ # restart policy
jellyfin/jellyfin
However, for many light users, the command line is not only inconvenient to understand, but also cuts off the space for subsequent modification and customization of the container. Therefore, for the vast majority of daily users, I personally strongly recommend using Portainer . It itself is also a program running in a Docker container, but it has powerful Docker management functions and is currently the most complete web-based Docker container management interface on the market.
Therefore, for those users who do not want to use the command line but also want to have more comprehensive control over Docker, Portainer is almost the only choice. With Portainer, even beginners can easily enable hardware decoding for Jellyfin.
Installation and use of Portainer
Since Portainer needs to call the /var/run/docker.sock file to achieve direct management of Docker, Portainer cannot be installed through the Docker management interface provided by QNAP or QNAP, because the above management interfaces do not support mapping of a single file. However, since Portainer requires fewer parameters to be configured and frequent modifications are not required after the container is created, ordinary users can directly copy the following command for installation.
sudo docker run -d --name portainer \
-v /var/run/docker.sock:/var/run/docker.sock \ # key setting
-p 9000:9000 \ # web UI access port
--restart=always \ # restart policy
portainer/portainer
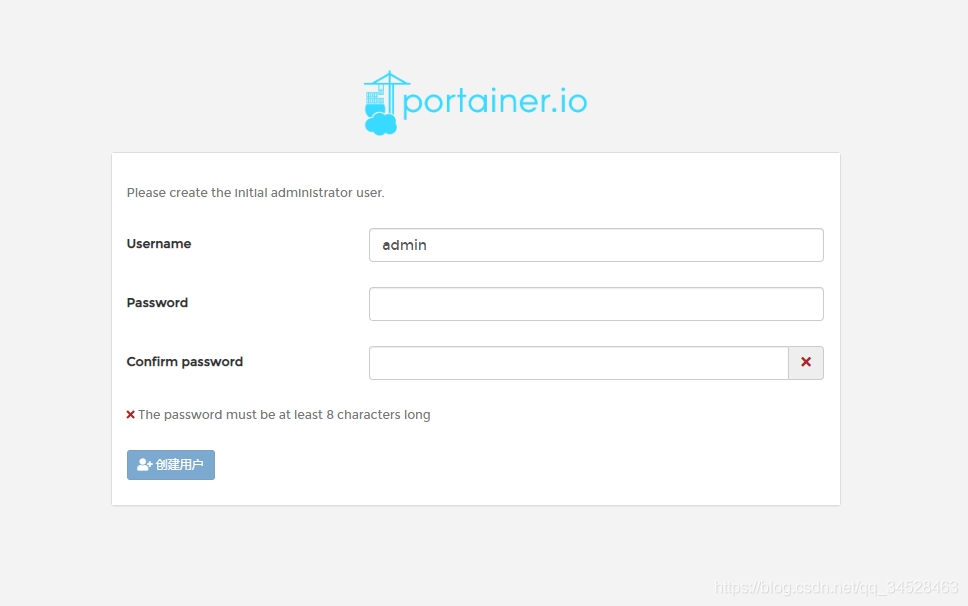
After the container is created, you can access Portainer’s management interface through IP:port. Portainer’s default access port is 9000. The first time you log in, you need to set up an administrator account and password.
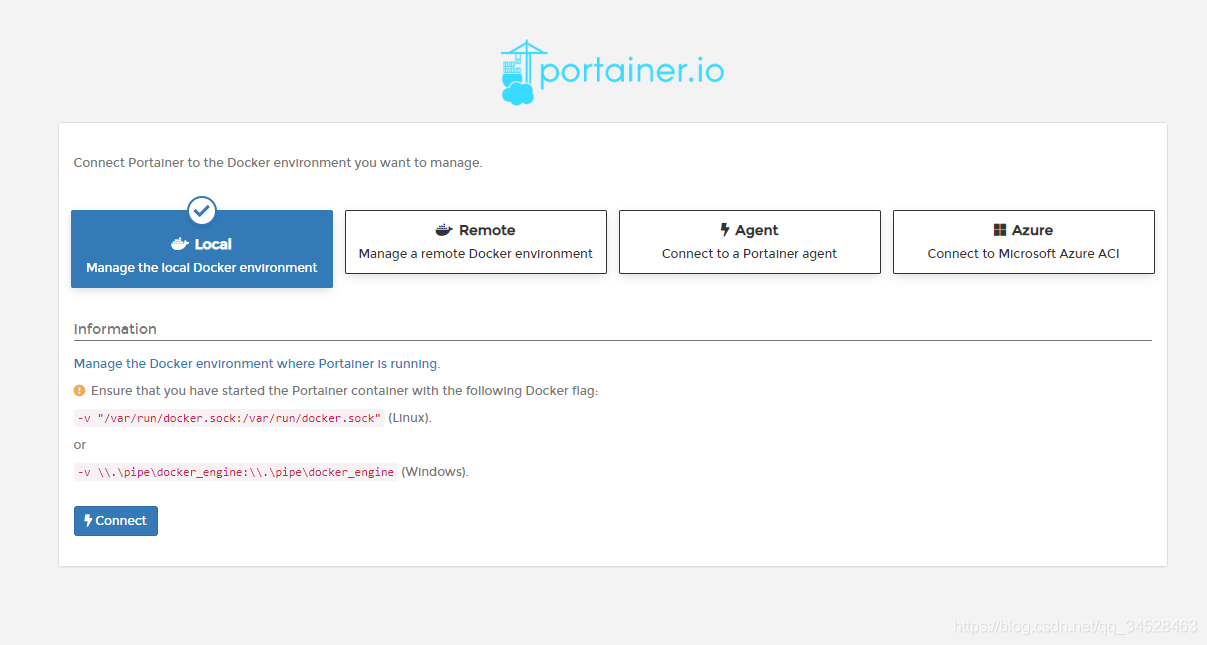
 Because it is used on a single machine, select “local” as the connection mode, and then click “Connect” to connect to docker on the server.
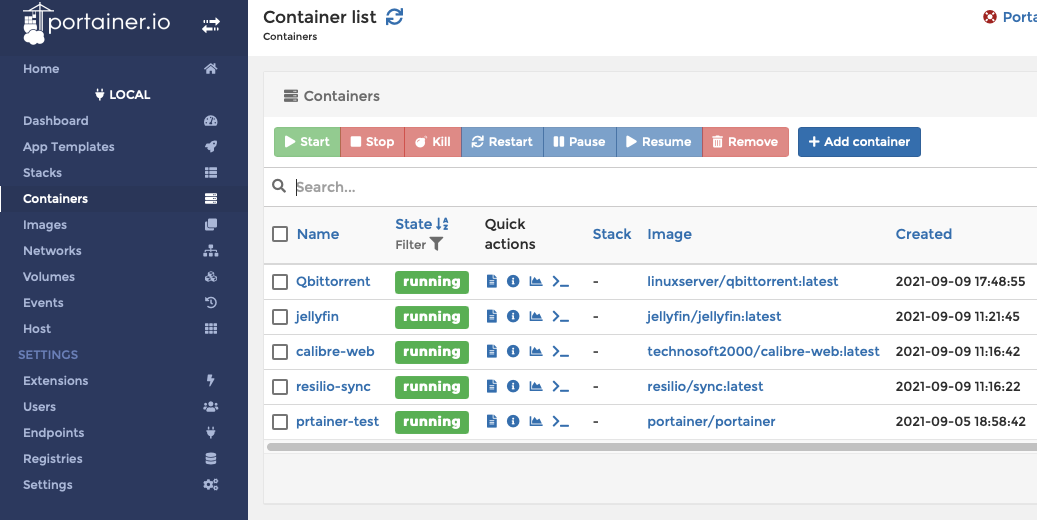
 After the configuration is completed, click local again and select Container on the left to use Portainer to manage all existing Docker containers on the system.
Install Jellyfin and pass through the integrated GPU driver (enable hard decoding)
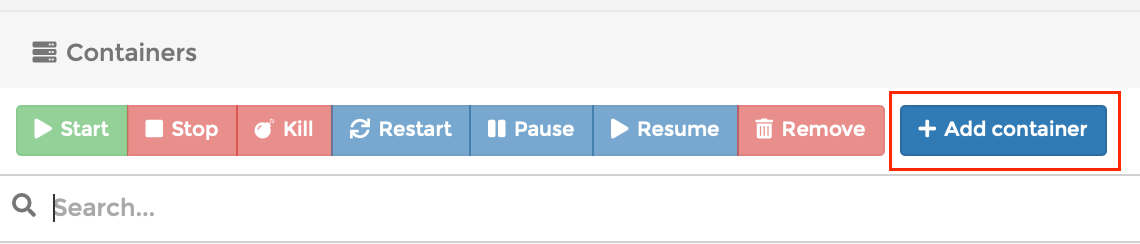
Subsequent installation and configuration processes will be completed on the Portainer interface. First click the “Add container” button on the “Containers” tab to add a new container and enter the container creation interface.
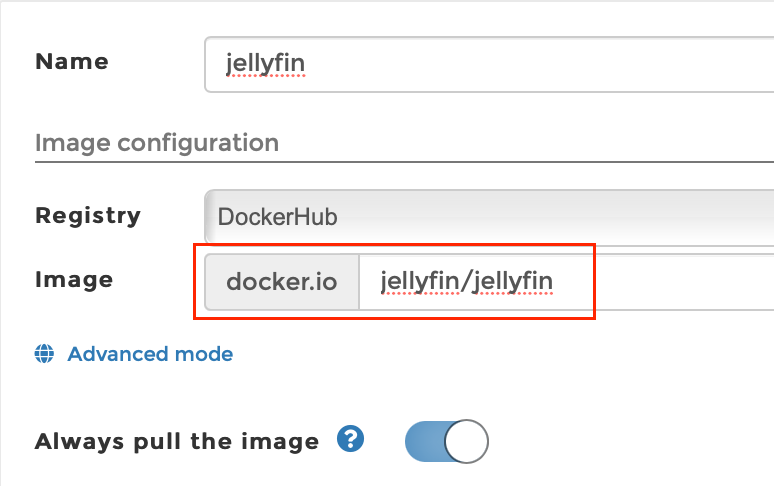
 Just write “Name” casually, and fill in “Image” with Jellyfin’s official Docker Hub image path
 jellyfin/jellyfin. “Always pull the image” can be turned on, so that when we complete the configuration and create the container, Portainer will automatically pull the latest official image from Docker Hub.
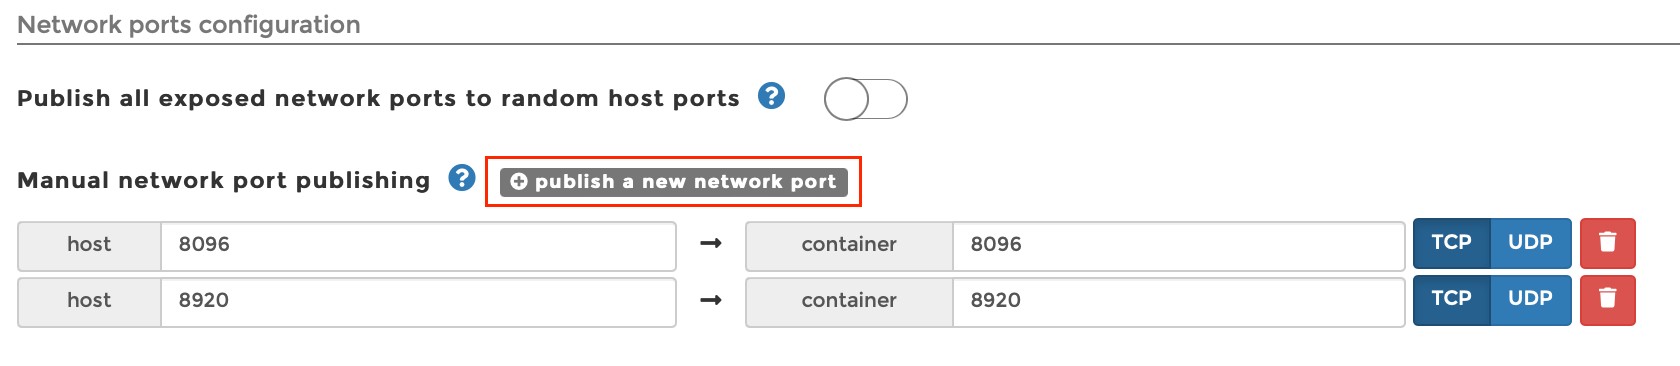
 Select “Manual network port publishing” under “Network ports configuration” and click “publish a new network port” to create two port mappings, 8096 and 8920, as access ports for the Jellyfin web interface.
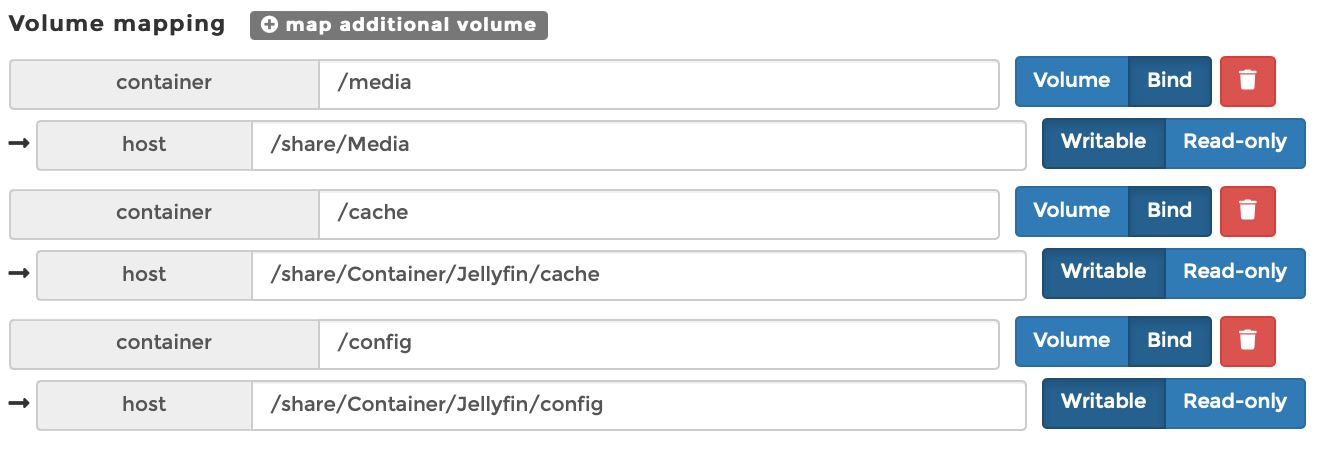
 Then click the “volumes” tab to map the directories within the container. The default directories that Jellyfin needs to map are
 /media, /cache and /config. Click the “bind” button to select the corresponding directory on the server for mapping.
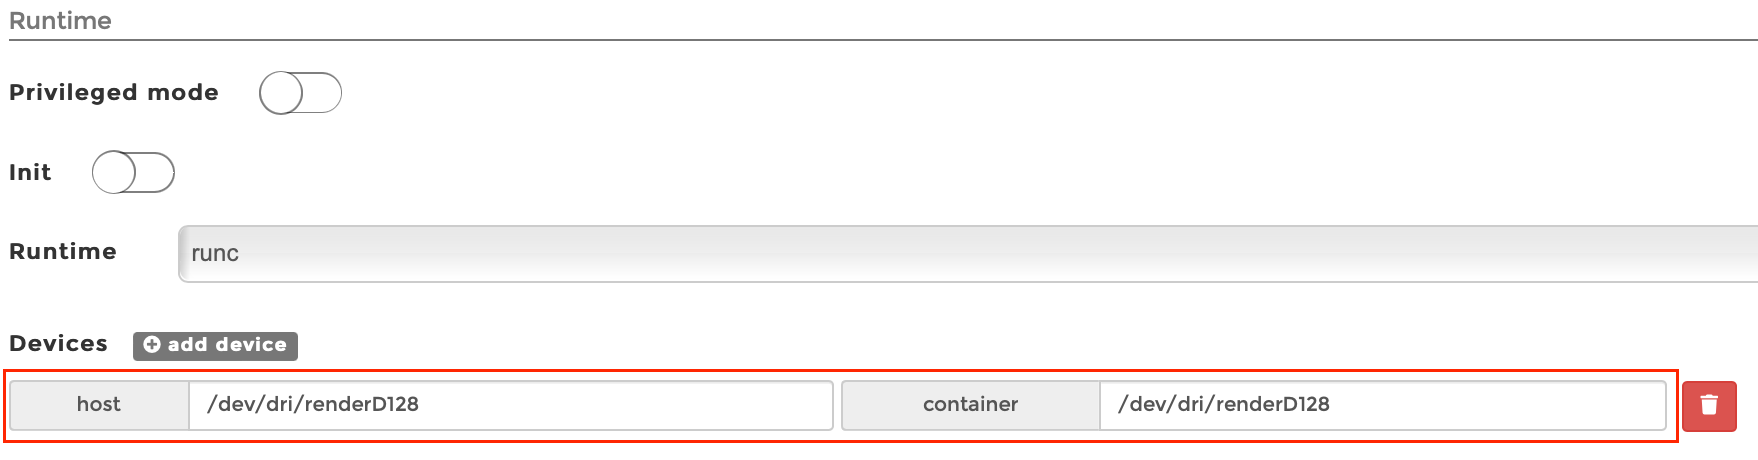
 Select “host” for “Network” and “always” for “Restart policy”. The most important thing is that you must click “add device” in “Runtime & Resources” and enter
 /dev/dri/renderD128 on both sides. This is a key step to enable hard decoding.
 After the above configuration is completed, you can click the “Deploy the container” button to create the container. If the network environment is good, wait for about half a minute to complete the creation of the container. At this point, we have not only manually configured the Docker container of jellyfin, but also passed the driver file of the integrated GPU directly to the container. Finally, as long as you enter the Jellyfin console, in the “Playback” tab, select the “Hardware Acceleration” type as “Video Acceleration API (VAAPI)”, and fill in
 /dev/dri/renderD128 in the “VA API Device”, you can call the server’s integrated GPU driver for hardware decoding.
