Background
With the increasing popularity of smart homes, major Internet giants have entered the market one after another, resulting in more and more smart home platforms and brands, and the products of various platforms and brands cannot be interoperable. For example, you cannot use Mijia smart switches to control homekit smart lights unless your product supports dual platforms, but currently there are very few smart homes that support more than two platforms at the same time.
Home Assistant (hereinafter referred to as HA) solves the problem of non-interoperability between smart home platforms. It is an open source smart home integration platform that can connect products from various common platforms and control them uniformly through various clients such as web pages and mobile app to achieve the true “Internet of Everything”. And the most important thing is that such a useful tool not only supports multiple operating systems such as Windows, MacOS, Linux, etc., it is also open source and free, and its extremely high scalability also provides a new research object for digital enthusiasts who love tossing.
Deploy HA container via Docker
As mentioned earlier, HA supports multiple operating systems, but if we plan to use it as a 7x24-hour standby smart home hub, the best choice is the Linux system, because it can run on low-power devices such as Raspberry Pi , ready to provide services to us at any time.
When it comes to Linux, we have to mention Docker. It is a highly compatible container system that can adapt to almost all Linux environments and can be installed and used out of the box. Today, we will focus on deploying HA through Docker containers.
My this article introduces in detail Portainer , a very easy-to-use Docker management container. Since the system environment of each reader is different, all Docker container installations introduced in this blog will no longer be limited to Synology, QNAP or Unraid, but will be unified through Portainer.
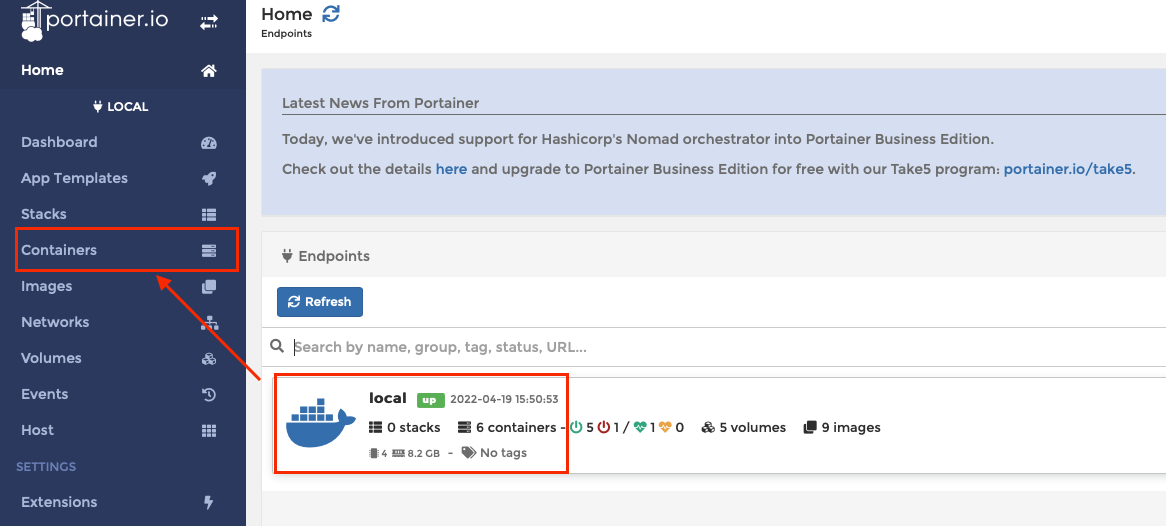
For the installation of Portainer itself, you can refer to the article mentioned above, and I will not go into details here. To install HA, we first need to log in to the Portainer backend, then enter the local terminal interface, which is Local, and then click Containers on the left to enter the local container management interface.
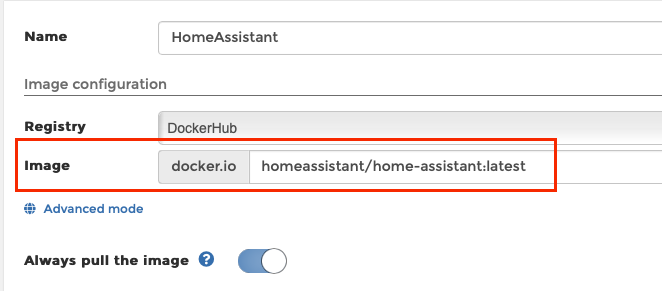
 Click Add container to create a new container, fill in the Name as you like, and enter the image index
 homeassistant/home-assistant:latest officially provided by HA as Image. Always pull the image can be turned on, so that every time the container configuration is modified in the future, the latest image will be re-pulled from the server.
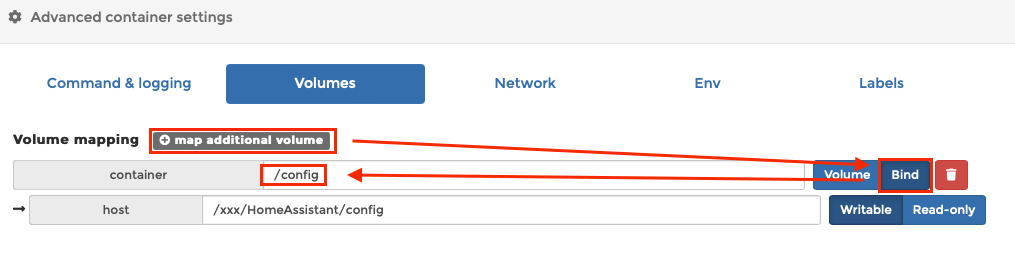
 Then click Volumes in Advanced container settings below, enter the directory mapping tab, click the map additional volume button to add a directory mapping, and select bind for the mapping method on the right. The directory in the container can only be written to
 /config, which is the directory where the HA configuration file is located. The directory on the host can be filled in according to your own needs.
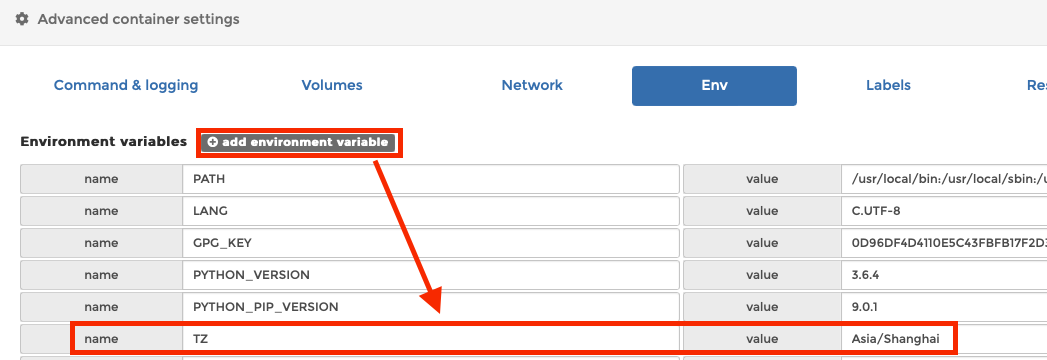
 Continue to click Env in Advanced container settings, enter the environment variable tab, click the add environment variable button to add an environment variable, fill in
 TZ for the name on the left, and fill in Asia/Shanghai for the value on the right. This sets the default time zone (Time Zone) of HA to Asia/Shanghai.
 The remaining advanced settings are relatively simple. Set Network to host and Restart policy to Always. Finally, click Deploy the container and wait for a while. If the network connection is smooth, the deployment of the HA container can be completed.
The default backend port of HA is 8123, so as long as we access the ip address: 8123 of the HA running device in the LAN, we can log in to the HA web page. When opening the HA web page for the first time, you need to perform some basic initialization configuration, such as user name and password, which will not be described here. It should be noted that the password of the HA administrator account cannot be retrieved. If we forget the password set here, we can only solve it by reinstalling the container.
Install HACS integration
The full name of HACS
is Home Assistant Community Store, which is a HA community store that provides various appearance themes and third-party integrated downloads. It is very easy to use and is recommended for all HA users to install.
 To install HACS, you first need to put its installation package into the HA container. Create two new directories in the /config directory mapped by HA, named
 www and custom components respectively. Click here
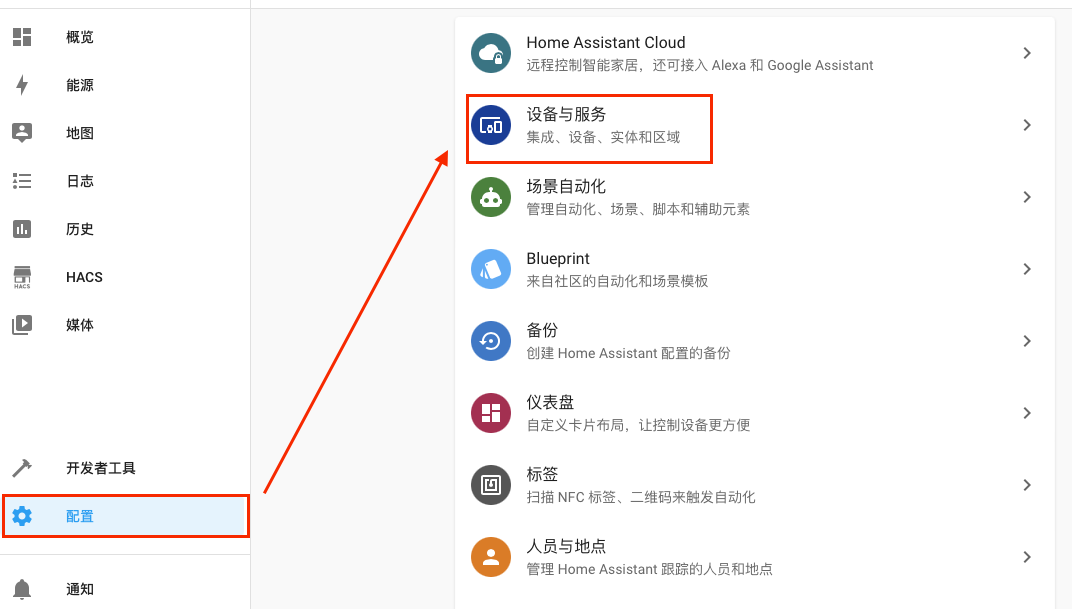
to download the HACS installation package. Unzip the hacs directory in the compressed package to the personal components directory just created, and then restart the HA container. Log in to the HA web page, click Configuration - Devices and Services - Integration in the lower left corner to enter the Integration tab.
 Click the Add Integration button in the lower right corner, search for HACS, click Install HACS Integration, and then follow the prompts to install it smoothly. During the installation process, you need to log in to GitHub once. If you do not have an account, you need to register one. In addition, the installation process requires a scientific network environment, which can only be solved by yourself. After the installation is complete, restart the HA container again. If nothing else, there will be an additional HACS button on the left side of the web page. Click it to enter the HACS store interface.
Connect Mijia to HA
In the past, to connect Xiaomi’s many smart homes to HA, we had to install a third-party HA integration, namely Hass-Xiaomi-Miot . It is released on GitHub by an individual developer al-one and has always been our only choice to connect Mijia to HA. Until December 2024, Xiaomi released the official HA integration on GitHub: HA_Xiaomi_Home , filling the gap of Mijia access to HA.
Although this is another story of “officials forcing a fan to death”, Xiaomi’s open source spirit is still worthy of praise. Compared with third-party integration, Xiaomi’s official integration has better support for its own products and can help us connect Mijia to HA more easily, thereby realizing the interconnection between Mijia and the Homekit ecosystem. For details on how to install and use Xiaomi’s official integration, please see my latest article , which will not be updated here.